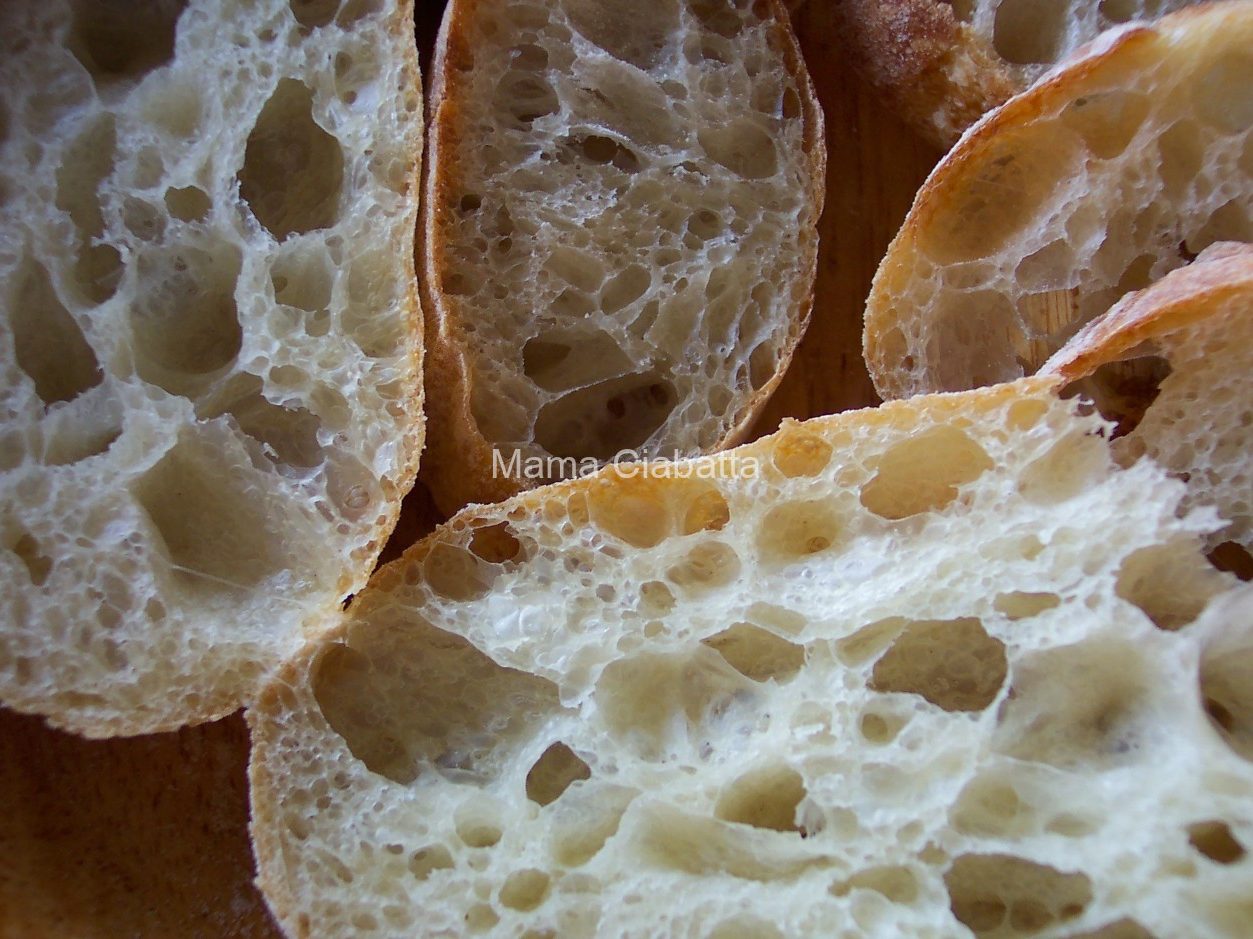


This recipe is a variation of my basic sourdough recipe with some extra ingredients. It is also quite distinctive in appearance and taste. While I was getting ready to write this post, I baked this type of bread twice using different olives.
Ingredients
- Active sourdough starter (refreshed the night before mixing the dough) — 200 grams
- Bottled water — 750 grams
- Bread flour — 1000 grams
- Rye meal — 100 grams
- Salt – 20 grams
- Olives and fresh rosemary to your liking.
I used cured black olives for the first bread and a mixture of different olives marinated with herbs for the second bread. All olives had pits in them. In my experience, non-pitted olives taste better. So, I had to remove all the pits before cutting them into pieces. Rosemary comes from my garden. I also winterize at least one plant inside the house.


Preparation
Pour 750 ml of lukewarm water into the bowl of a stand mixer fitted with the dough hook attachment.
Add 200 g of ripe sourdough and start mixing on a low speed. The water will look like milk.
Gradually add flour, starting with the whole grain rye flour, just until incorporated.
Do not add any salt at this stage. Cover the mixing bowl with a clean kitchen towel and let the dough rest for 10 minutes.
Add salt and continue mixing the dough on medium speed for about 5 minutes.
You have the dough for 2 loaves of bread. You can divide the dough right after mixing and make one loaf of bread with no additives, and another loaf of bread with olives and rosemary.
After you divide your dough, you handle each part the same way up to the point when you finished 2 stretches and folds. You make 2 more stretches and folds (4 total) for the basic loaf and follow the basic bread tutorial for that bread.
Don’t forget to let your dough rest for 20 minutes before you proceed to the next step – stretch and fold the dough with your hands right in the bowl.
After you finished 2 stretches and folds in the bowl for your future rosemary olive loaf, you put your dough on the oiled work surface and stretch it gently into a flat rectangle.
Spread some of your chopped rosemary and olives all over the surface of the dough.


Fold the dough onto itself like an envelope. Then spread some chopped olives and rosemary all over the white part of the dough.
Keep folding the dough and spreading your chopped mixture after every fold. That way, you incorporate everything well and do not overwork the dough.


- The simplest way to shape the boule is based on the envelope fold technique, which I explained above. You start by folding your envelope of dough into a new, tighter envelope.
- If your dough still feels too relaxed, you gather the corners towards the center to add more strength. This creates some tension on the surface of your dough, which is exactly what you are aiming for. You may need to perform 1-4 rounds of gathering corners towards the center technique. It all depends on the quality of your dough and your experience as a baker. You stop when your dough feels strong enough to hold the shape.
- After you finished gathering the corners, you need to seal the seams you created. Flip the dough over. Then drag the dough against your work surface in a circular motion until it feels tight. Thus, you need only a little flour on your work surface to make this movement possible.
- This boule, seam side down, goes into the prepared round basket for the final proof.
- You stretch your pre-shaped and relaxed piece of dough to round it out. Do not overstretch.
- Fold the right side of the dough towards the left a little past the middle.
- Fold the left side of the dough the same way. You overlap the previously folded side.
- Start rolling your piece of dough from the bottom up, stretching and tightening up the surface as you go.
- When you reach the end, seal the seam with your fingers.
- Put your batard into the basket seam side down.