Categories
Pizza Spelt flour Yeasted bread

Spelt inspiration

Spread the love

I do not make all my bread sourdough. In fact, I started my baking adventure with artisan yeasted bread. Sourdough came into my life much later. I do make my everyday bread mostly sourdough, though. I also bake a lot of yeasted bread. I employ different methods, which allow me to work with as little yeast as possible. My goal is to make healthy bread.


Sourdough bread is trickier to handle than yeasted bread. I leave sourdough preparation for the weekend and use yeasted dough when I need some extra bread on weekdays. Yeasted dough is very forgiving and versatile. You can fit it into a very busy daily routine with ease. Stay tuned and I will show you how.


This dough is my new favorite for weekdays, unanimously approved by the family. It has a 40% flour mix with spelt flour, which gives a lot of flavor to the finished product. For the other 60%, I use bread flour. The dough has only 1/4 teaspoon of yeast for 1,770 grams of raw dough. It is suitable for bread and for a pizza or flatbread.


The ingredients:


Filtered or spring water — 725 grams

Bread flour — 600 grams

Spelt flour — 200 grams

Millet flour — 100 grams

Sprouted whole wheat flour — 100 grams

Yeast, active dry or instant — 1/4 teaspoon, leveled

Sea salt — 20 grams


Mixing the dough:


Pour water into the mixer bowl. Sprinkle yeast on top. If you use Active Dry yeast, follow the directions on the package on how to activate the yeast. I use lukewarm water and let the yeast rehydrate for 5-10 minutes. Instant yeast is ready for mixing with no activation. 

Add about half of the flour and start mixing on a low speed. Gradually add the rest of the flour. This way you do not overload your mixer and avoid dusting your kitchen with flour. Add salt with the last portion of the flour and mix the dough for 5 minutes.
 
 
After the mixing:
 
Give your dough another 20-minute rest. Then shape the dough into a ball and put it into an oiled container for proofing. 
 
 
 Refrigerating the dough:
 
Let your dough proof at room temperature for about an hour and a half before putting it in the refrigerator. You may use it any time the next day (up to 72 hours after the mixing). 
 
 
Preparing the dough for baking:
 
Take the dough out of the refrigerator. Cut the piece of dough to make a flatbread, pre-shape it into a ball, and let it rest for 20-30 minutes at room temperature. 
 
 
If you want to make pizza or flatbread, you may start stretching the dough with your fingers as I explained in my post about the Pizza Margherita.
 
 
If you want to make mini bread, follow the shaping directions for the batard from my post about the Basic Sourdough Bread.
 
 
Let your bread proof for 1.5-2 hours. The bread will rise, but it will not double in size. To check if the bread finished proofing, you could try to poke it lightly with your finger. The bread is ready for baking when the indentation from your finger springs back slowly. If it springs back fast, the bread needs some more time to proof. If the indentation does not spring back, your bread is over-proofed and the bread will not rise to its full potential. 
 
 
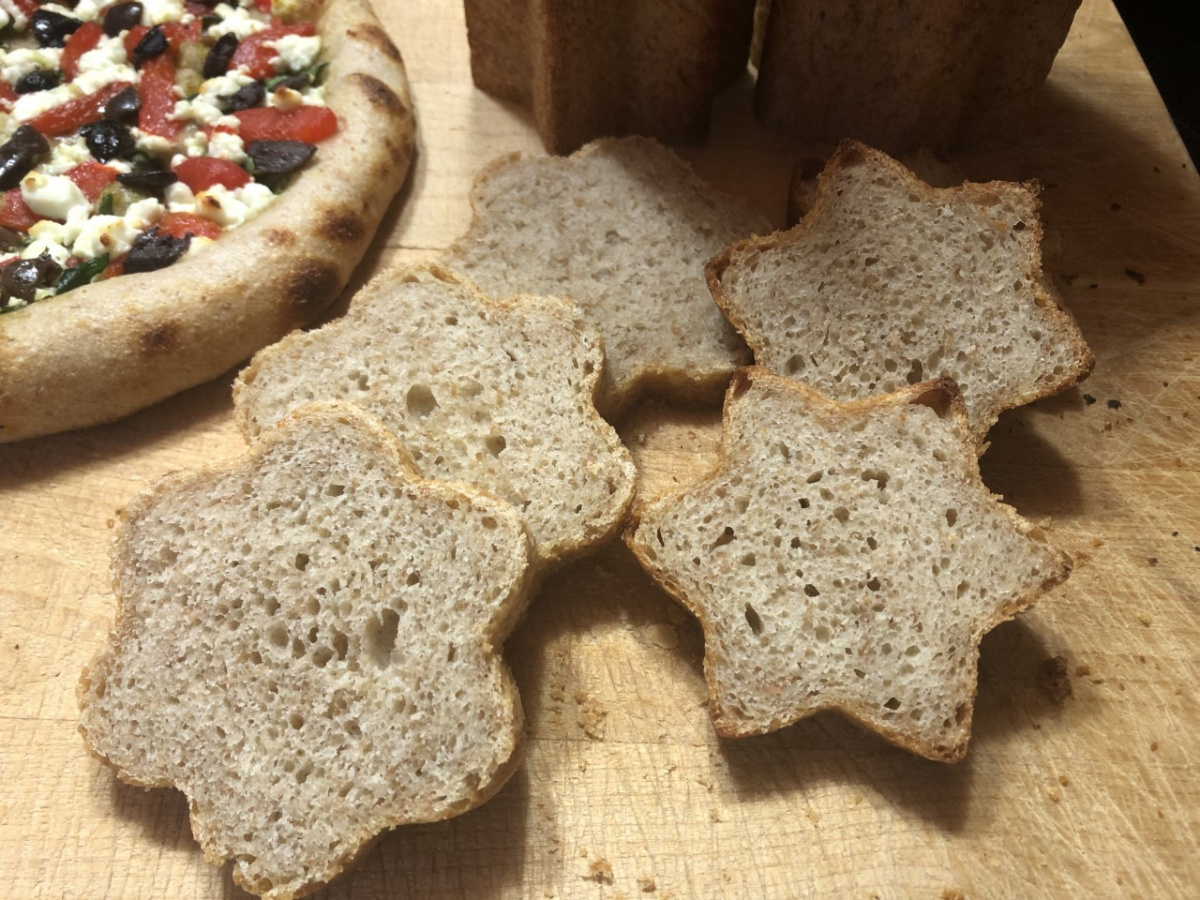
This time I wanted to make 2 mini pizzas, 2 mini loaves of bread, and leave some dough for the next day’s flatbread. In the dark corner of my pantry, I found two tin baking molds, which I bought years ago and never used. I did not know how much dough to put inside. 400 grams looked fine.
 
 
Then I cut two 400-gram pieces of dough for the mini bread and two 200-gram pieces for mini pizzas. I also put three 150-gram pieces in the refrigerator to use in the next few days.


I greased the baking molds with Ghee, shaped the 400-gram pieces of dough into mini batards, and put them inside the molds for proofing. These molds have removable lids on both sides. When the bread rose by 50% I started preheating the oven to 400° F (204° C). 
 
Baking:
 
400° F (204° C) — 40 minutes. Then I took the bread out of the tins and finished the baking at 375° F (190° C) — 5 minutes. 
 
 
Mini Pizza — 1
 
 
It is a fusion of pizza and flatbread. It is not as thin as my white pizza. The dough in this mini pizza is as important as the toppings. I did not use any tomatoes on this pizza. Instead of the traditional tomato sauce, I used pesto. 
 
 
Toppings:
 
 
Pesto, roasted peppers, arugula, goat cheese, and a variety of olives.

Baking — pizza or flatbread:


550°F (288°C) on ceramic tiles for 6-7 minutes for 1 mini pizza or 8-9 minutes for 2 at a time.


Mini Pizza — 2


I used the refrigerated 150-gram pieces to make two mini pizzas and one flatbread with cinnamon and sugar for the kids. I baked all three of them at the same time.


550°F (288°C) on ceramic tiles for 9-10 minutes for 3 at a time. I do not make my dough rounds very thin. I think that the bread part in these mini pizzas is very significant. A thicker crust creates the perfect harmony between the bread and its toppings. 

Happy baking!
 

Solverwp- WordPress Theme and Plugin